In a fast-paced world, planners are essential tools to help you stay organized, reduce stress, and achieve your goals. Whether you prefer paper or digital formats, planners offer benefits like task management, time allocation, and goal tracking. This guide breaks down how to choose the right planner, customize it to fit your needs, and use it effectively. Here’s what you’ll learn:
| Feature | Paper Planners | Digital Planners |
|---|---|---|
| Interaction | Hands-on, physical writing | Screen-based, digital tools |
| Accessibility | Must carry the planner | Syncs across devices |
| Editing | Manual corrections, less durable | Easy edits, cloud backup |
Start small, test different methods, and build a system that fits your lifestyle. Whether you prefer creative designs or simple structures, the right planner can help you stay on top of your tasks and goals.
Choosing the right planner starts with understanding what different formats offer. For instance, the Hobonichi Techo Weeks is a compact option with a weekly layout and plenty of space for notes. It blends structured daily planning with room for jotting down extra thoughts.
Erin Condren planners are known for their vibrant designs and customizable layouts, making them a favorite among creative professionals who want a mix of practicality and style.
If you prefer complete control over your layout, bullet journals are a great choice. They’re perfect for visual thinkers and anyone who likes to tweak their planning system as their needs evolve.
Your choice between digital and paper planners depends on how you like to organize your life. Here’s a quick breakdown:
| Feature | Paper Planners | Digital Planners |
|---|---|---|
| Interaction Style | Hands-on, with physical decorations | Screen-based, using digital tools |
| Accessibility | Must carry the physical planner | Syncs across multiple devices |
| Durability & Editing | Prone to wear, manual corrections | Cloud backup, easy to edit |
Making your planner personal can motivate you to use it consistently. Start by focusing on sections you rely on most, then experiment with layouts or tracking systems that fit your lifestyle. It’s all about balancing practicality with a touch of creativity to make planning enjoyable.
Once you’ve picked your planner, make it visually appealing and uniquely yours. A little customization can go a long way in keeping you engaged.
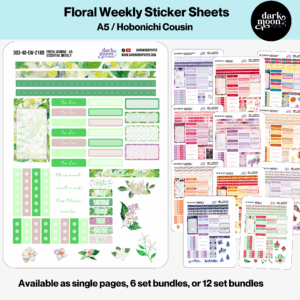
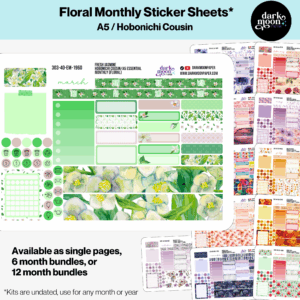
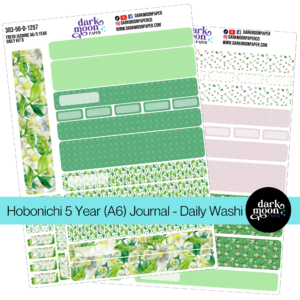
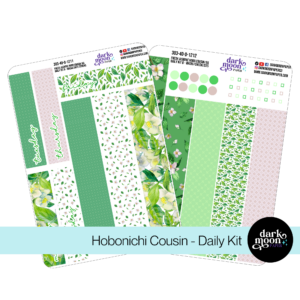
Stickers can turn your planner into a more organized and visually appealing tool. Use functional stickers like checklists and boxes to structure your schedule, and sprinkle in decorative stickers for a bit of flair. Themed sticker kits are a great way to combine practicality with a touch of personality.
| Purpose | Sticker Type | Best Placement |
|---|---|---|
| Task Organization | Checklists, Boxes | Daily/Weekly Task Areas |
| Visual Appeal | Headers, Icons | Corners, Margins, Calendar |
Once you’ve added structure with stickers, you can make your planner even more personal by incorporating journaling elements.
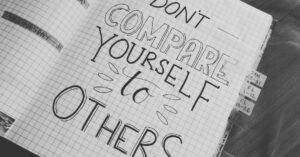
Journaling brings a personal and reflective element to your planner. Use specific sections to jot down thoughts, reflect on your day, or track your mood. A simple mood tracker – like color-coded dots or small doodles – can give you a quick visual overview of your emotions throughout the week.
You can also fill unused spaces with small sketches, motivational quotes, or even short notes about your day. These touches make your planner feel more personal and meaningful without cluttering the layout.
Design layouts that work for your needs while keeping them visually pleasing. For example, color-code tasks by category to make your planner easier to navigate. Place habit trackers in spots you’ll notice daily and use a simple grid system to monitor your progress. Each box in the grid can represent a habit, and you can fill them in as tasks are completed.
Here are some layout ideas to consider:
These tweaks can help you create a planner that’s both functional and uniquely yours.
Now that your planner is customized and visually appealing, let’s dive into how to get the most out of it.
Turn your planner into a tool for achieving your goals by using the SMART framework. For example, set clear goals like "spend 30 minutes daily updating planner tasks" and break them into smaller, actionable steps. Use your planner pages to track milestones and deadlines so you can see your progress over time.
| Goal Type | Tracking Method | Review Frequency |
|---|---|---|
| Daily Tasks | Checkboxes | End of day |
| Weekly Goals | Progress bars | Sunday evening |
| Monthly Projects | Milestone charts | Last day of month |
To stay on top of your priorities, try using the Eisenhower Matrix. This method divides tasks into four categories: urgent/important, important/not urgent, urgent/not important, and neither urgent/important. It’s a simple way to decide what needs your attention first.
Plan for about 75% of your time and leave the rest open for unexpected tasks. This balance helps you stay productive without feeling overwhelmed. Use tools like color-coding or symbols to visually mark your tasks by priority.
Start planning events about two months in advance by dedicating a section of your planner to key dates. Add themed stickers or decorations to make these pages stand out and ensure important events are easy to spot.
| Timeframe | Planning Focus |
|---|---|
| 8 weeks before | Budget and guest list |
| 4 weeks before | Send invitations |
| 2 weeks before | Finalize menu and decor |
| 1 week before | Shopping and preparation |
Adding creative elements like stickers or custom layouts can make event planning more enjoyable. Use visual tools, such as color-coding and decorations, to keep everything organized while maintaining a personal touch. This approach ties your functional planning with the creative aspects you’ve already worked on.
Planning becomes enjoyable and effective when you mix practical organization with a touch of creativity. The secret is finding tools and methods that match your personal preferences. Whether you lean toward structured systems or more flexible formats, the goal is to make your planning approach suit your needs.
| Planning Element | Purpose | Benefit |
|---|---|---|
| Creative Touches | Self-expression | Boosts motivation to use your planner |
| Personal System | Organization & Customization | Encourages consistent habits |
Once you’ve identified the core elements of your planning process, trying out various styles can help you fine-tune your system.
Test out different planning methods to figure out what resonates with you. Start small – try adding simple tweaks like color-coding before moving on to more elaborate techniques like bullet journaling or goal-mapping.
The goal of planning is to develop habits that steadily improve your organization and productivity. Let your style grow and adapt as you discover what fits your life best.
For example, if you prefer simplicity, a minimalist layout might work perfectly for managing daily tasks. On the other hand, if you’re visually inclined, flexible formats can help with setting and tracking goals. The key is choosing methods that feel natural and enjoyable.
Here are some ideas to consider:
| Planning Style | Best For | Recommended Tools |
|---|---|---|
| Minimalist | Managing daily tasks | Basic weekly layouts |
| Creative | Visualizing goals | Open-format journals |
| Structured | Detailed project planning | Pre-designed systems |
The best planning method is one that you actually look forward to using. Whether you prefer adding artistic flair or keeping things straightforward, your system should feel like an effortless fit for your lifestyle.
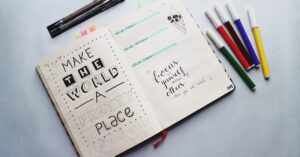
Making your bullet journal visually appealing is about blending creativity with organization. A well-designed journal not only reflects your style but also keeps you motivated to stay on top of your plans.
| Design Element | Purpose | Suggested Tools |
|---|---|---|
| Color Schemes | Creates harmony | Markers, color palettes |
| Basic Layouts | Provides structure | Grid layouts, spreads |
| Decorative Items | Adds personality | Washi tape, stickers |
To get started, you don’t need to be an artist. Use simple tools like markers, washi tape, and stickers to create a cohesive and functional design. Here are a few beginner-friendly tips:
For example, compact planners like Hobonichi Techo offer clean layouts while leaving room for creative touches. Keep your design simple and practical – start with a basic layout, limit your colors, and focus on durability to create a bullet journal that’s both stylish and functional.

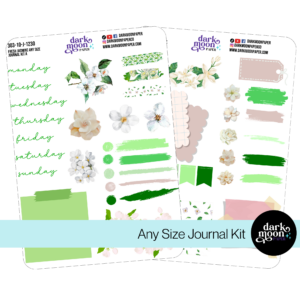
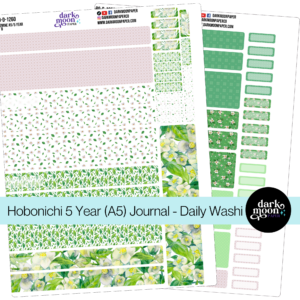
Stickers Made for Planning
Our custom stickers are a fuss-free way to brighten up your planner pages with perfectly-sized designs that add a spark of personality to every layout.
Why use planner stickers?
Planner stickers make organizing easy, fun, and personal! Add color, creativity, and structure to every page, transforming your planner into a tool that reflects you. Perfect for tracking, decorating, and staying inspired daily!


Hello and welcome!
I’m Rachael Snow, a lifelong artist and entrepreneur, and I started Dark Moon Paper to blend my love of art, technology, and the mysterious beauty of the world around us. My sticker kits are meant to set the mood, tell a story, and give you a little escape from the ordinary.
I work from my cozy studio tucked away in the beautiful woods of Oregon, surrounded by nature and a dark night sky full of stars.