Monthly planning in a Hobonichi Weeks planner is more than just listing dates—it’s a ritual of creativity, intention, and self-care. At Dark Moon Paper, we’ve seen firsthand how a thoughtful monthly setup can spark inspiration and make even the most mundane routines feel special. In this guide, we’ll walk you step-by-step through our favorite way to transform a blank Hobonichi Weeks month—from the cover page to the dashboard—using high-quality sticker kits designed to blend artful style with purposeful organization. Whether you’re new to functional planning or looking to deepen your monthly prep, this guide is packed with practical tips and beautiful ideas that reflect our love for the tactile, creative side of planning.
Why Focus on Your Monthly Planning Ritual?
For Hobonichi Weeks enthusiasts, the monthly spread is the command center for work schedules, family commitments, self-care, and creative goals. But it’s also a blank canvas with so much potential. Customizing this space at the start of each month helps:
Visualize your upcoming priorities at a glance
Stay motivated with a layout you genuinely enjoy using
Track habits and goals with just enough structure
Capture the essence or vibe of your month through design and color
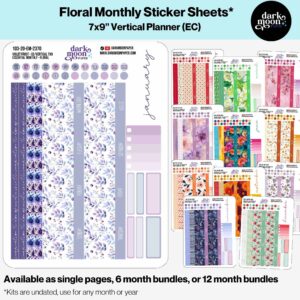
Step 1: Setting the Tone—Decorative Monthly Cover Pages
Before marking up your monthly calendar, many planners love to start with a decorative cover page. This can turn the first page of each month into a mood board or theme, helping you set intentions and bring a sense of ritual to your planning routine.
Use a dedicated monthly cover sticker to instantly create a fresh, cohesive aesthetic.
Add washi tape or small accent stickers to frame your cover, creating a welcoming introduction to each month.
Consider jotting down a monthly mantra, focus word, or a small goal right on the cover sticker to remind yourself of your theme.
Add fun and style to your planner by starting each month with a themed cover page.
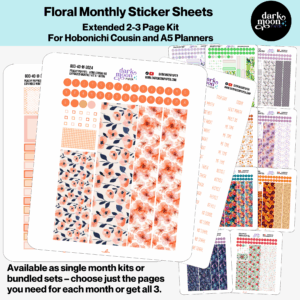
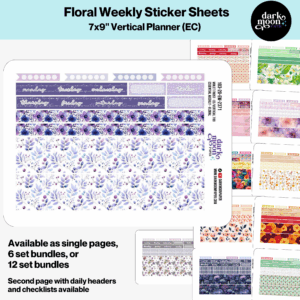
Step 2: Structuring Your Monthly Calendar Spread
The iconic gridded monthly pages of Hobonichi Weeks are versatile, but taking a few moments to map out the basics sets you up for functionality and joy throughout the month.
Date covers and squares: Use a monthly kit with labeled date covers or decorative squares for each day. This not only makes your spread visually appealing but also helps distinguish weekends, holidays, workdays, and special occasions.
Highlighting priorities: Use color-coding with dot stickers, transparent icons, or small headers for categories like work, personal, appointments, bills, or self-care days.
Little details: Add tiny icon stickers for birthdays, meetings, or recurring tasks so nothing gets missed.
A Hobonichi Weeks kit designed for the monthly layout, like those we offer at Dark Moon Paper, can help you achieve a crisp, organized look while leaving space for creativity.
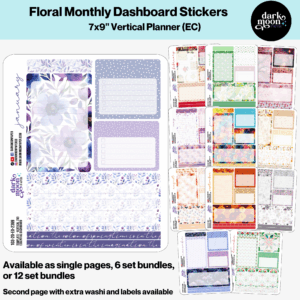
Step 3: Building Your Dashboard—Functional Meets Beautiful
The monthly dashboard is where beauty meets real organization. Think of it as your navigation panel—a single page or section (often adjacent to your monthly spread) that holds everything you need to reference quickly throughout the month. Here’s how to maximize your dashboard with stickers:
Headers and sections: Use labeled headers for categories like goals, bills, reminders, important dates, and gratitude.
Habit trackers: Add small tracker stickers or grids to visualize habits, mood, water intake, or step counts for the whole month.
Decorative accents: Don’t underestimate the motivational power of a tiny floral sticker, a moon phase icon, or a seasonal embellishment! Balance functional sections with just enough beauty to keep it inspiring.
Monthly dashboard kits keep your must-see info organized and easy to find.
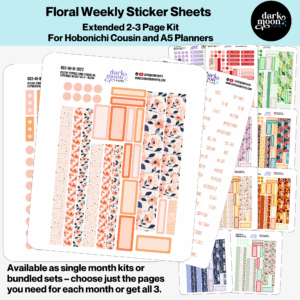
Step 4: Creating a Seamless Workflow with Weekly Stickers
Your monthly plan only comes to life if it flows into each week. To bridge the gap, dedicate a section of your monthly dashboard or the notes column to map out the highlights for each week in advance. Then, use coordinated weekly sticker kits that carry the same theme across your monthly and weekly layouts—this creates a visually harmonious system and helps streamline your planning process.
Match your kits: Try pairing monthly cover and dashboard kits with weekly kits in the same collection (such as Winter Hygge or Cottage Succulents) for a cohesive look.
Transition tasks: As the month progresses, migrate remaining to-dos or goals directly into the corresponding week using functional box or label stickers.
Weekly sticker kits help your month flow beautifully into actionable weeks.
Step 5: Personal Touches—Habitual and Seasonal Decoration
Don’t forget the magic of small, personal details. Our customers often love to embrace the season (cherry blossoms in spring, cozy hygge motifs in winter) using themed decorative elements. Here are some ways to make the month uniquely yours:
Choose a color palette or motif that fits your mood or the season (moody forest, pastel succulents, starlit sakura…)
Use script or quote stickers for encouragement
Add washi tape along the top or edge of each spread for a touch of artistry
Include a mini dashboard for notes or inspiration you want front and center all month
Step 6: Reviewing Your Month—Reflection and Reset
The end of the month is a perfect time to review and reset for the next cycle. Here’s how we like to close the loop before turning the page:
Use icon or highlight stickers to mark completed goals, milestones, or especially meaningful days
Move unfinished to-dos into your next monthly dashboard or cover page as a gentle reminder
Reflect with gratitude: add a memory or positive note to your month’s cover page, turning your planner into a keepsake
Tips for Planning Success with Sticker Kits
Start simple if you’re new—one kit can go a long way in getting organized and inspired
Mix decorative and functional stickers on each spread for beauty and utility
Choose high-quality matte stickers made for Hobonichi’s thin pages to avoid bulk and see-through
Keep extras (icons, flags, washi strips) in the back pocket of your planner for easy mid-month updates
Putting It All Together: A Month That Reflects You
Curating your monthly planning routine—from the welcoming cover page, through each detailed dashboard and week, to the final reflection—turns your planner into an evolving, creative record of your life. With custom-designed sticker kits for Hobonichi Weeks, there’s a world of possibility to explore, blending organization with self-expression every time you turn the page.
Our custom stickers are a fuss-free way to brighten up your planner pages with perfectly-sized designs that add a spark of personality to every layout.
Planner stickers make organizing easy, fun, and personal! Add color, creativity, and structure to every page, transforming your planner into a tool that reflects you. Perfect for tracking, decorating, and staying inspired daily!
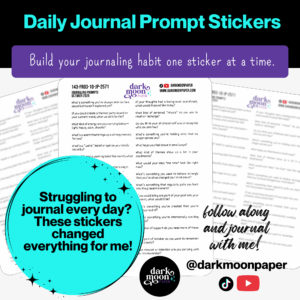
I’m Kat, the artist behind Dark Moon Paper. I started this studio to blend my love of art, handwriting, and the small rituals that make everyday life feel magical. My sticker kits and creative resources are made to set the mood, spark ideas, and give you a little escape from the ordinary.
I create from a cozy studio in the Oregon woods, surrounded by nature and a clear view of the stars.