Monthly reflection spreads in the Hobonichi Cousin aren’t just a decorative exercise—they’re an incredible tool for self-awareness, creativity, and growth. At Dark Moon Paper, we’re passionate about helping planner lovers like you craft a monthly review that feels both functional and inspiring. In this guide, we’ll walk through how to create a meaningful monthly reflection spread using dashboard and cover page stickers—sharing detailed, actionable tips designed specifically for Hobonichi Cousin users who want their planners to work as beautifully as they look.
Why Create a Monthly Reflection Spread?
Clarity & Focus: Review what worked, what didn’t, and set clear intentions for the month ahead.
Motivation: Celebrate progress and small wins, making each month feel purposeful.
Artful Mindfulness: Combining structure with creativity makes the process enjoyable and personal.
Gathering Your Supplies
Here’s what we recommend for building a monthly reflection spread in your Hobonichi Cousin:
Hobonichi Cousin planner (A5 size)
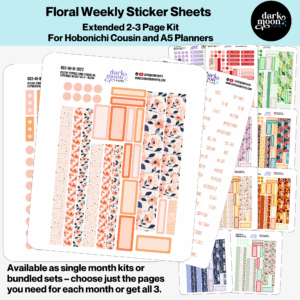
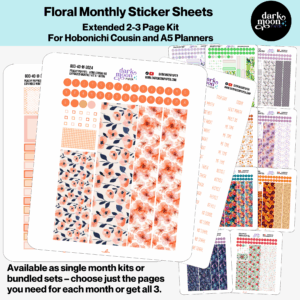
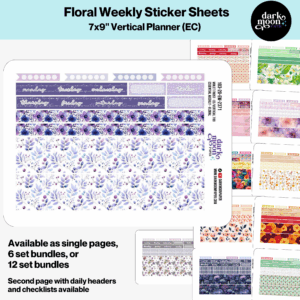
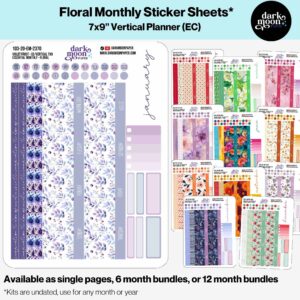
Monthly cover page stickers for decorating the top or intro to the month (view examples)
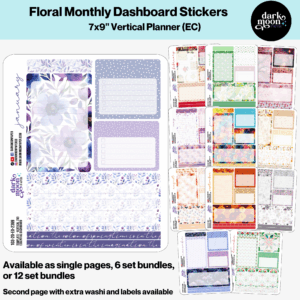
Dashboard sticker kits to organize key review areas (explore options)
Washi tape, favorite pens, and page flags (for personal accents)
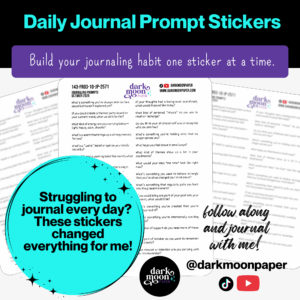
Any inspiration or prompts you like—e.g., favorite quotes or guided questions
Step 1: Set the Tone with a Cover Page
The cover page is your monthly “doorway”—it sets the mood for your reflection and planning.
Choose a cover sticker with a vibe that matches your month—cozy for winter, fresh for spring, bold for new beginnings, or tranquil for renewal.
Don’t be afraid to layer! Frame your sticker with washi tape or add a handwritten inspirational quote.
Start on the grid page before monthly calendar spreads. This is a common spot for dashboard layouts in the Cousin.
Apply the cover page sticker to the first page—this serves as your welcome mat for the new month.
Right after, build your dashboard reflection layout. Place headers for each section you want (using stickers), leaving space for writing and doodling.
Add habit trackers or grids as needed. Many dashboard kits include functional elements perfect for this!
Accent with decorative stickers. Don’t be afraid of white space but let your personality shine through details.
Step 4: Answer Reflection Prompts
Thoughtful questions turn your dashboard from a to-do list into a page of meaningful insight. Here are some prompts you might include and answer in your spread:
What was the highlight of this month?
Which challenge helped you grow?
What habits were easiest to maintain?
What would you like to focus on next month?
One thing you’re letting go of, and one thing you’re welcoming in.
If you use a guided dashboard kit, you can write answers under the appropriately labeled section. If you’re feeling more freeform, cluster your thoughts around the page and highlight them with icons or frames.
Step 5: Embellish and Personalize
This is where your spread transforms from structured to stunning!
Layer in smaller decorative stickers (florals, celestial elements, animals—whatever feels right for you).
Highlight important words or lessons with washi strips, colored pens, or lettered headers.
Consider adding a small photo or memory to make it extra personal.
Step 6: Review and Set Intentions
Close out your monthly spread by writing a short note-to-self:
“This month I learned…”
“Next month I want to focus on…”
Sign and date it—make it a mini letter to your future self!
Inspiration: Dashboard and Cover Page Kits from Dark Moon Paper
Your Hobonichi Cousin’s monthly reflection can be beautifully organized and inspiring with the right kits. Here’s how our stickers make it seamless (and lovely!):
Monthly Cover Page Stickers: Set the tone with a themed focal sticker for each new month. Use them alone, or together for a coordinated look throughout the year.
Dashboard Kits: Build multi-section layouts easily—headers, trackers, prompts, and decorative touches are all included so you can focus on reflecting, not fussing with supplies.
Dashboard & Reflection Stickers to Structure Your Review
Tips for Making Your Reflection Flow All Year
Consider a recurring color theme for each month—for a cohesive year (great for flipping back and comparing over time).
Have a running “Growth Log” section—carry the most meaningful insight forward each month to see progress.
Let yourself be imperfect! Some months will be messy. Pastel marker? Extra stickers? Go for it—progress over perfection.
Bonus: Sample Layout for Your First Monthly Reflection Spread
Building a monthly reflection spread in your Hobonichi Cousin with dashboard and cover page stickers is more than an organizational strategy—it’s a mindful ritual that makes your planner uniquely yours. At Dark Moon Paper, we love seeing how our community brings these spaces to life. Share your layouts, experiment with formats, and remember that your reflection spread is for you—no rules, just creative potential!
If you’re excited to try this approach, check out our full selection of Hobonichi Cousin dashboard and cover page kits. Whether you love calming winter coziness, enchanting botanicals, or playful colors, we’ve designed our stickers to make organizing—and reflecting—a true pleasure every month.
Our custom stickers are a fuss-free way to brighten up your planner pages with perfectly-sized designs that add a spark of personality to every layout.
Planner stickers make organizing easy, fun, and personal! Add color, creativity, and structure to every page, transforming your planner into a tool that reflects you. Perfect for tracking, decorating, and staying inspired daily!
I’m Kat, the artist behind Dark Moon Paper. I started this studio to blend my love of art, handwriting, and the small rituals that make everyday life feel magical. My sticker kits and creative resources are made to set the mood, spark ideas, and give you a little escape from the ordinary.
I create from a cozy studio in the Oregon woods, surrounded by nature and a clear view of the stars.