Turning your weekly planner into a tool that’s both useful and visually appealing is easier than you think. Here’s how you can combine structure, creativity, and practicality to design pages that keep you organized and inspired:
- Choose a Layout: Try vertical daily columns, split-page setups, or time-block grids to suit your planning style.
- Add Aesthetic Touches: Use themed stickers, color-coding, and compact trackers to make your planner pop without clutter.
- Boost Functionality: Incorporate habit trackers, meal plans, and priority markers to stay on top of tasks and goals.
Whether you use a Hobonichi Weeks, Erin Condren, or a bullet journal, these tips help you create a planner that works for you. Keep reading for detailed ideas and examples to transform your weekly spreads.
1. Layout Styles
-
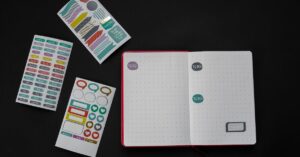
Vertical Daily Columns: Break each page into vertical sections for a tidy, organized weekly view. This works perfectly with the Hobonichi Weeks planner, which features small dots on the left-hand page to guide column creation [1]. Add washi tape to separate days and use Pastel Stabilo 0.4mm fine liners to prevent ink from bleeding through the pages.
-
Split-Page Setup: Use the left page for daily tasks and the right for a weekly overview. This approach, popularized by planner enthusiasts like Polkadotparadiso, makes planning more efficient. The grid on the right page can double as a space for habit trackers or step counters [1].
-
Time-Block Grid: Divide each day into three sections – morning, afternoon, and evening – using horizontal lines. This setup is great for busy professionals who need a clear view of how their time is divided [2]. Use color-coded highlighters or washi tape to separate work, personal, and health-related tasks.
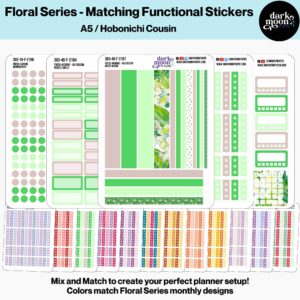
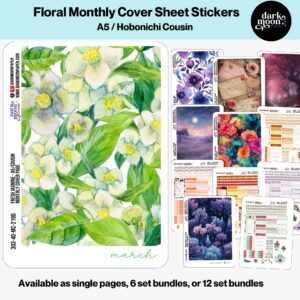
To add a personal touch, try themed sticker kits from Dark Moon Paper, such as "Lilac Dusk" or "Winter Hygge." Functional stickers like headers and trackers can also enhance your layout, combining style with practicality. Once you’ve picked a layout, small decorative details can make your planner both useful and visually appealing.
2. Aesthetic Touches
-
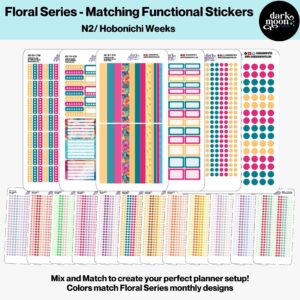
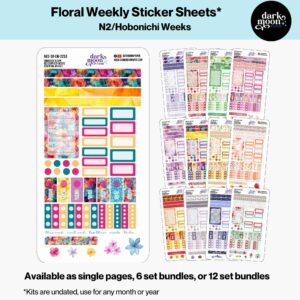
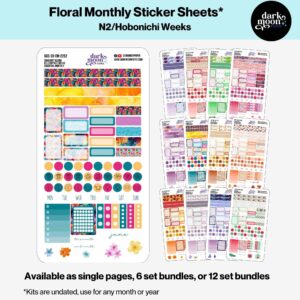
Themed Sticker Collections: Elevate your weekly spreads with seasonal sticker kits like Dark Moon Paper’s "Winter Hygge" or "Lilac Dusk". Use functional stickers – like headers and trackers – alongside decorative ones to create layouts that are visually appealing and easy to navigate [3].
-
Color Coding with Purpose: Assign specific colors to different task categories. For example, use blue for work, green for personal appointments, and purple for health-related activities. This method not only organizes your planner but also adds a pop of color [2].
-
"Year in Pixels" Tracker: Add a small "Year in Pixels" tracker to monitor moods or habits. Use compact stickers or thin washi tape, and place it in a corner of your layout for a stylish yet functional addition [3].
When incorporating these touches, balance is key. Dedicate areas for decoration while keeping essential planning sections uncluttered. For Hobonichi Weeks users, the dot grid pattern is especially useful for precisely placing stickers and washi tape without overcrowding your space [4].
Once your planner looks great, it’s time to focus on keeping it just as practical!
sbb-itb-57598ef
3. Functional Add-Ons
After making your planner visually appealing, it’s time to boost its usefulness with practical features that fit your lifestyle.
-
Time-Block Framework: Take advantage of the Hobonichi Weeks’ grid layout by dividing it into 30-minute slots. Use color-coded icons for recurring activities to create a clear, easy-to-read schedule. This method keeps things organized while fully utilizing the grid design.
-
Habit Tracker: Add small dot stickers or checkboxes to track up to five habits each week. Place the tracker in the same corner every time to keep the layout consistent and clutter-free.
-
Meal Planning Section: Set up a small grid for breakfast, lunch, and dinner with space for grocery lists or recipes. Add simple headers or icons to give it a personal touch while keeping everything neat.
-
Task Priority System: Organize tasks by urgency with simple markers – red dots for urgent items, yellow stars for important ones, and checkboxes for routine tasks. This keeps your priorities clear and manageable.
Leave enough white space in your planner for last-minute changes or additions. These small tweaks can turn your planner into a reliable tool for staying on top of your schedule and goals.
Conclusion
A well-designed weekly planner combines structure and creativity, making organization feel like a rewarding habit. By using tools like habit trackers, time-blocking layouts, and meal planning sections, you can build a system that stays effective while adjusting to your needs.
Begin with layouts that suit your style, whether it’s the structured format of a Hobonichi Weeks or the open-ended approach of a bullet journal [1]. Mix functional tools like time-blocking and habit trackers with personal touches like stickers or washi tape to create pages that are both practical and visually appealing [2].
Consistency and smart placement are key. Keep priority markers and trackers in predictable spots, but leave enough blank space for flexibility [3]. This balance ensures your planner stays useful without becoming purely decorative.
Focus on what works best for you. Use color-coding systems that match your workflow, and make sure any decorative elements support rather than distract from your organization [2]. With a little effort and regular tweaking, your weekly planner can become a tool that keeps you both inspired and on track.
Start small, adjust as you go, and let your planner grow into something that truly enhances your daily life.
FAQs
How do you make a weekly spread?
Start by including the basics: events, tasks, and goals. From there, add sections for notes or reminders to suit your needs. The goal is to organize these elements in a way that fits your personal planning style.
To make it practical:
- Set aside space for time-sensitive events
- Dedicate areas for ongoing projects
- Highlight 3-5 key objectives for the week
- Leave room for quick notes or reminders
The Hobonichi Weeks layout is ideal for blending structure with creativity [1]. You can tweak it to include sections for habits, meal planning, or anything else you want to track. Using consistent colors and layouts helps keep everything clear and easy to follow [2].
Related posts